When the Export Stock Items option is set to "Avery Berkel Export", Stock Items will be exported in the following format (the BESTBEFOREDAYS field will display each Stock Item's Best Before Days Attribute value if the Attribute Type/Attribute has been set for the Stock Item - see below for more info).
ADD/DELETE,CODE,DESC,PRICE,SCALE,BESTBEFOREDAYS
This function can be used to export data in a format that is accepted by Avery Berkel Scales.
To configure this function, complete the steps as listed in the order below:
If the Best Before Days functionality isn't required, this section can be skipped.
Go to: Back Office > File > Sales > Stock Item Attributes.
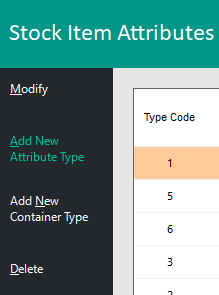
Create a new Attribute Type by pressing the "Add New Attribute Type" button.
Enter "Best Before Days" into the Add Attribute Type field, and if required, the Available in Columns checkboxes can be toggled to only enable the usage of this Attribute Type in the specific Attribute Type slots in the Stock Items.

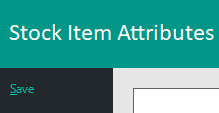
Press ENTER or press "Save" on the top-left corner to save the new Attribute Type.
Press the "Add New Best Before Days" button on the top-left corner.
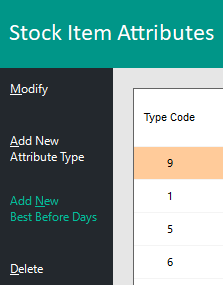
Enter the Best Before Days (ensure that each Best Before Days Attribute is a separate Attribute).
E.g. DO NOT create a comma separated Attribute with multiple days (e.g. 1, 7, 14, 20).
Create separate Best Before Days Attributes > Press "Save" on the top-left corner after creating each Best Before Days Attribute, or press Enter to save the currently entered Attribute.

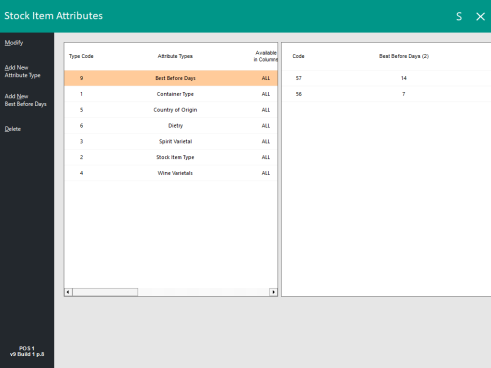
Once completed, the Best Before Days Attribute Type should appear on the left-hand side column, and when that Attribute Type is selected, a list of Best Before Days should appear within the right-hand side column.
Close the Stock Item Attributes window.
then go to: Back Office > File > Stock Control > Stock Items.
Modify the required Stock Items and assign the "Best Before Days" Attribute Type, then select the number of days that the Stock Item is Best Before from the day that it is sold.
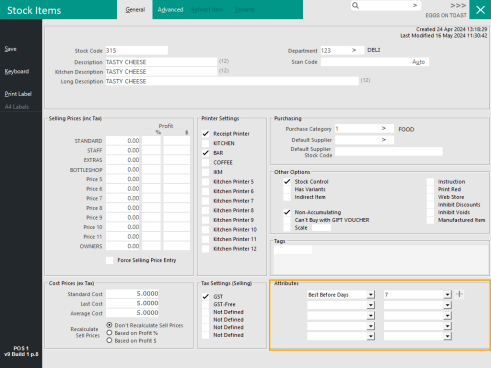
Repeat the process for all Stock Items that require this Attribute Type.
Close the Stock Items window once this has been completed for all the required Stock Items.
Open Windows File Explorer and create a folder for the Stock Item Export.
An existing folder may also be used - if a folder already exists where the Exported Stock Item data will be exported to, continue to the next step.
This folder may be a location that is configured with third-party software from Avery Berkel Scales which may be used to export to the scales - this is outside the scope of the User Guide; refer to Avery Berkel whether this is a manual or automated process.
Once a folder for the exported Stock Items has been created or located, go to:
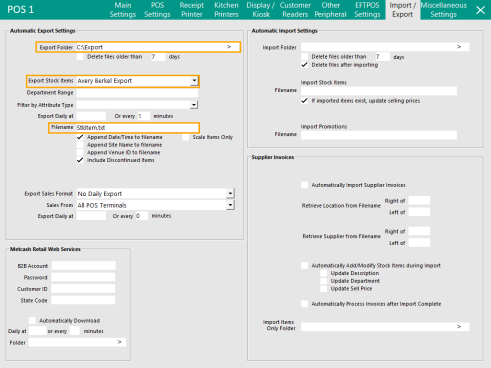
Back Office > Setup > POS Terminals > Modify > Import/Export > Automatic Export Settings > Configure as follows:
Export Folder - This is the folder location that was created in the previous step.
Export Stock Items - Select "Avery Berkel Export".
Department Range - If a Department Range is required, enter it here. Department Range can be entered as a comma separated list (e.g. 1,2,3) or as a range (e.g. 101-105), or as a combination of both (e.g. 101-105,110).
Filter by Attribute Type - This can be used to filter the Exported Stock Items to only include items that are assigned to a specific Attribute Type (e.g. Best Before Days).
Export Daily at or every minutes - Configure this setting as required. If Exporting Daily at, enter the time in 24 hour format; the data will only be exported once a day at the specified time. Or if exporting every X minutes, leave the Export Daily field at as blank and enter the minute interval required. The data will be exported at the entered minute interval.
Filename - Enter the required filename. Entering a filename without a file extension (e.g. StkItem) will create a file using the entered filename without a file extension. If a file extension is required, enter the file extension after the filename (e.g. StkItem.txt).
Append Date/Time to filename - This will append the date and time to the filename (the date and time when the data is exported) using the format of YYYYMMDDHHMMSS, where YYYY is the year, MM is the Month, DD is the Day, HH is the hour in 24 hour format, MM is the minute and SS is the seconds. The Date/Time is appended to the end of the filename. E.g. StkItem_20240516101213.txt.
Append Site Name to filename - This will append the Site Name to the filename (the Site Name is inherited from Setup > Sites and is whichever Site the POS Terminal is located in).
Append Venue ID to filename - This will append the Venue ID to the filename.
Include Discontinued Items - This will include Stock Items in Idealpos that have been marked as being Discontinued.
Scale Items Only - This will only include Stock Items that have the scale checkbox enabled.
The minimum required fields for this function have been annotated in the screenshot below.
Once configured, close the POS Terminal Settings.
The Stock Items will be exported using the interval configured.
When the data is exported, the data is exported in the following order/format as follows:
ADD/DELETE,CODE,DESC,PRICE,SCALE,BESTBEFOREDAYS